Thursday, December 11, 2008

How to Be a Curious Photographer


Source Digital Photography School


A few months ago I wrote a post on how curiosity is a characteristic of great photographers.


I was rereading this post earlier this week and began to ask myself a few questions:


  • How do some people end up more curious than others?

  • Is Curiosity a personality trait or can it be learned?

  • How can I be more curious?

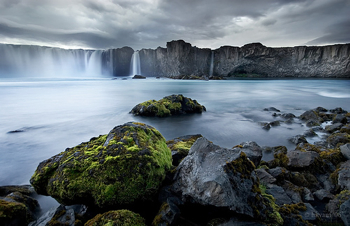
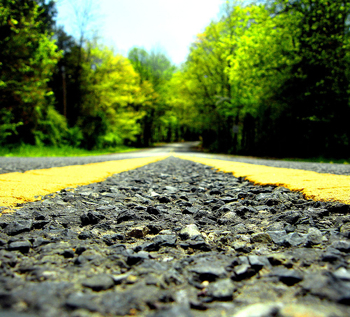
As I pondered these questions I thought of the images that I see each day on Flickr’s interestingness pages (the shots in this post come from there). Some of the shots are just so unusual that I would never have thought to take them. Obviously there are some ‘curious’ photographers behind them - but how do they do it?


I’ve never studied this but I suspect that while curiosity could well be something a personality type thing and that some of us will be more naturally curious than others - it is also that we can all probably learn how to be - to some extent.


How can you add Curiosity to your Photographic toolbox?


10 Ways to be a more Curious Photographer:


1. Don’t be held Captive ‘the Rules’


There are a lot of ‘rules’ going around when it comes to photography. Read the books (read this blog) and you’ll find them. Some of them have formal names like ‘rule of thirds’ and ‘the golden ratio’ while others are often just called ‘the right way to…’.


Rules are a great thing to know (and use) - however the curious photographer often takes great shots because they not only know the rules but because they set out to break them.


Take the Rule of thirds - sometimes the most powerful shots are those with a centered subject staring down the barrel of the lens.


2. Ask Questions


Curious photographers are always asking questions. Questions of other photographers, questions about their own work, questions about their cameras, questions of their subjects etc


As a result they often learn things about their art (and themselves) that the rest of us don’t and their work improves because of it.


Find someone with the same camera as you and ask them how they use it. Find a photographer from a different genre to you and ask them about their techniques. Look back over your last month’s photos and ask yourself what you did well (and not so well).


3. Ask ‘What if…’


One of the key questions you should get in the habit of asking is ‘what if’? Curious people don’t just ask questions - they also come up with solutions.


Many of the solutions will end up being thrown away but if you ask ‘what if’ enough times you’re bound to make progress eventually.


What if I held the camera on this angle…. What if I got my subject to stand like this…. What if I lay on the ground to take this shot…. What if I lengthened my shutter speed…..


4. ‘Turn Questions into Quests’


An old teacher once used this phrase with me and it’s stuck in my mind ever since - ‘turn your Questions into Quests’.


Asking ‘what if…’ (and other questions) is not enough. Keep a record of the questions that you ask yourself and keep coming back to them from time to time to attempt to find a solution to the problems behind the questions. Taking your questions to the next level like this may not always be fruitful but at times it’ll lead you on journeys of discovery to unexpected places.


Set yourself quests and challenges for your photography. I occasionally set myself a list of photos that I want to capture in an afternoon or will have a week where I explore a theme (the assignments in our forum are great for this).


Get more tips and tutorials from our free weekly newsletter


5. Learn from Others


While sometimes the best way to learn is by trying, making mistakes and then trying again - sometimes it’s more effective to find someone else who has already tried, made mistakes and tried again to help you avoid the pitfalls of photography.


Find another photographer to buddy up with when you go out on shoots. Swap ideas, give each other tips and share the lessons that you learn. This is actually whey I started this blog and more recently our forums - I want to learn more about digital photography and I know together we’ll discover so much more.


6. Put disconnected ideas together


Edward De Bono has a lot of different exercises that help people develop lateral thinking skills. In a number of his books he talks about how one way to think outside the box is when you put random ideas together to find new solutions to problems. Get in the frame of mind where you regularly do this and you’ll be surprised at how your mind comes up with wonderfully creative things.


The shot above of the guy under the umbrella with capsules dropping down on him is a prime example of this. Who would have ever thought to put drugs raining down on someone under a bright umbrella?


7. Play


Perhaps the most curious of people are children who do a lot of what we’re writing about here (especially asking questions).


Another thing that children do is ‘play’. With no other agenda than having fun and seeing what happens next children will play with the things around them and experiment and push the boundaries of their environment. In doing so they learn about life, themselves and their world. I find that it’s often when I take this ‘playful’ approach to life that I’m at my most creative and make all kinds of discoveries.


Some of my best photos have come out of periods of ‘play’ when I just fooled around with my camera with no agenda at all. Play with new angles, with different shooting distances, with shooting from different perspectives etc


8. Go with the Flow


One of the biggest blockages to creativeness and curiosity are statements like:


  • We’ve never done it this way before

  • This is Stupid

  • It will never work

It is often directly after such statements that ideas stop being explored, projects end and people return to the humdrum of life.


Learn to ignore such statements and follow your intuition and hunches and you might just find yourself doing something that ‘has never been done before’ that people wish HAD been done before. I’m sure many of the images in the Flickr interestingness page are the result of this evolution of ideas by people who didn’t know when to stop.


9. Get Proactive


One of the main things that I notice about curious people are that they rarely sit still and are always pushing forward and taking the initiative. Curious photographers don’t expect great photographic opportunities to come to them - but instead they actively search for them. They have a mindset where it almost becomes natural to ask, seek and find the things that the rest of us hope that will one day fall in our laps.


Grab your camera, get out of the house, find some interesting subjects and start shooting. That great shot won’t just come knocking on your door!


10. Slow Down


We live in a fast paced world where we race from one thing to another, rarely sitting still.


Unfortunately it is easy to bring this way of life into our photography. We impatiently wait for ‘the shot’ and when it doesn’t quickly come we snap away and move on. However in most cases photography isn’t a fast paced medium. I learned this talking to a Pro Landscape photographer once who told me that some days he’d sit in a spot for a full day and only take a handful of shots. He had learned to slow down, to see the smaller subtleties of life, to be patient and the results were that his work was truly magnificent.


Set aside a few hours this week to go and sit quietly in a pace in your town or city and watch the world go by. Don’t set yourself an agenda - just watch and when you see something worth photographing take the shot.


Moving Toward Manual Settings: Understanding Basic Daylight Exposure and Equivalent Exposure


Source Digital Photography School


daylight-exposure-title.png


In this post, Hawaii photographer Natalie Norton wraps up the 4th post in her series on manual camera settings - this one exploring Basic Daylight Exposure and Equivalent Exposure.


Don’t miss other installments.


Wow! Is anyone else as excited as I am about the stuff we’ve been learning about manual settings?


I know that for a lot of us it’s old news and rudimentary to say the least, but to quite a few DPSers out there, this has been just what the doctor ordered.


Thank you for all the email love letters!


I’m SO glad the info has been helpful and that it’s starting to click! Congratulations!!


Today we’re going to wrap it all up in fancy cellophane and call it a day! We’re so close. Again, if you haven’t read first 3 articles in the series I suggest checking them out before you read the rest of today’s post.


daylight-exposure-Title 2.png

The first thing you need to understand today is BASIC DAYLIGHT EXPOSURE (BDE). This is also referred to as the SUNNY 16 rule. Basically this is how it looks if you’re one of the remaining wackos who understand equations ;):


BDE = 1/ISO @f16


If equations aren’t your cup-o-joe, then think of it like this: To achieve proper exposure on a bright sunny day, your ISO and your shutter speed are going to be the same when you’re aperture is set at f16. This will ALWAYS be the same as long as it’s a bright sunny day. Now from here, and I’m not gonna lie to you, we get to run our brains over repeatedly with a Mack truck. BUT, I promise you it will all click if you give it a second and you’ll be a superstar photographer forevermore.


daylight-exposure-Title 3.png


Basically what the phrase “equivalent exposures” is referring to is achieving the same exposure while manipulating the depth of field in different ways.


Let me illustrate:


Let’s say you’re out at the beach on a bright sunny day. So you think to yourself, “Hey, Natalie taught me all about Basic Daylight Exposure! I’m gonna try it out!”


So you set your ISO to 100 (see here if you’re like “a whoobie what’s that now!?”) and thus you’re going to have a shutter speed of 1/100th. . . because what’s the equation for BDE?? Basic Daylight Exposure = 1/ISO at f16. So you’ve got your shutter speed and your ISO matched up and you shoot your aperture on up to f16 and SNAP! You’ve got a great, perfectly exposed beach scene. You can see mom and dad clearly in the foreground. You can also see the kids playing in the water behind them, also in clear focus. You can see the boogie boarders in the background in clear focus as well. Your image is perfectly exposed, not too bright, not too dark, JUST RIGHT!


So you’re thinking you’re hot stuff until you think, “You know, there’s a lot going on in this photo. There’s really no focal point. It’s TOO BUSY!” You decide you’d like to focus only on mom and dad and throw everything else in the image out of focus. . . you’re going for a shallow depth of field. SOOOOO what’s a girl to do? . . . or a boy as the case may be. Well, clearly you need to open up your aperture, right? Open that baby up to give you a more shallow depth of field. Now we understand from the post Understanding Aperture that in order to OPEN our aperture to let in more light and cause a shallow depth of field, we’re actually going to be setting the camera on a LOWER aperture number. So we open that baby on up to f4 and SNAP! . . . uh oh, what the heck happened?? We have an image that is just pure white! All light. Completely blown out. NOW WHAT? This is where Equivalent Exposures come into play. . . this is also the point where you really need to have read the other articles in the series. Part I, Part II, Part III. GO! For the rest of you, let’s break this down:


  • You had a correct exposure of the beach scene when your camera was set to ISO 100 at 1/100th of a second f16.

  • When you dropped the fstop down to f4, you let in WAY too much light and ended up with an image that was completely blown out.

  • The obvious answer would be to increase the shutter speed, right? To let in less light? You got it! BUT, by how much? How do we know how fast our shutter speed should be? Equivalent Exposures. That’s how.

Since you started at f16 and went down to f4, how many stops did you change your aperture by? Look at the chart below, that you SHOULD have memorized if you did your homework from Part I. . . and see how many FULL STOPS you had to move to get from f16 to f4. Go on and count ‘em.


daylight-exposure-True Apertures .png


In the chart above you see the TRUE apertures. Those highlighted in blue are the common apertures for most lenses.


That’s right, 4 stops. You went down 4 FULL F STOPS to get from f16 to f4. . . now here’s the secret of life. . . you simply have to match that number of stops with your shutter speed to achieve the same exposure with a different depth of field! In other words, since you opened your aperture by 4 stops, you simply need to speed up your shutter speed by 5 stops in order to ensure that the same amount of light hits your sensor as it did at f16. . . THUS ACHIEVING THE SAME EXPOSURE WITH A DIFFERENT DEPTH OF FIELD. “Bing!” That was the sound of the light bulb going off in your brain. It’s OK to be excited. It really IS that simple. Don’t be scared to go back and read it again if you need to, but don’t make it harder than it is.


daylight-exposure-Equivalent Exposure.png

The chart above is an illustration of Equivalent Exposures. Each setting above will allow the SAME amount of light to hit your sensor. The exposure will be the same in each instance, the only difference would be the depth of field.


Let’s do another little quiz:


You’re at a horse race. . . because that’s something normal people like me do all the time, we go to horse races. Anyway, so you’re at a horse race and it’s bright and sunny out, but with a few clouds in the sky. You decide to use an ISO of 200. So, using BDE, what’s your camera going to be set at? ISO 200, 1/250th (250 because it’s the closest shutter speed to your ISO of 200) at f16.


You take a shot of Ocean Muffin, the fastest horse in the race, check your LCD and decide that you’d like to see more movement in the shot. You want to show just how fast Ocean Muffin really is! What are do you need to do?? Slow down your shutter speed, that’s right. So let’s say you decide to drop your shutter speed by 2 full stops. So you’re now at what? You should have these memorized by now if you’ve read the other posts in the series. You’re now at 1/60th of a second. But remember, when you slow down your shutter speed, you’re going to be letting in more light, so what else do you need to do? Close down your aperture (higher fstop) by 2 stops. Now your aperture would be at what? F32, right.


That way you can keep the same exposure and still show Ocean Muffin in all his magnificent glory. HOWEVER! What if your camera only goes up to f22? OH NO NO NO! What ever will you do now? You need to drop your shutter speed by 2 stops to catch O.M’s movement, but you can only close down your aperture by one! What else can you do? I’ll give you a hint, check out Part II in the series on shutter speed (the link’s up top). That’s right, your ISO also affects your exposure, right? So, I’d go ahead and move my aperture by one stop and adjust my ISO by one stop, taking it from 200 to 100. . .that way I’ve adjusted my exposure by 2 stops to compensate for slowing down my shutter speed by 2 stops! YAY, the world is right again!!


NOTE: Because I don’t use a light meter, I almost always start out using BDE and then adjust accordingly until I find the right exposure for the light I am in. This is one of the many reasons to hail the LCD screen as king of the world and all things that are good. . . you can SEE if your exposure is dead on and tweak it bit by bit until it is! I’ll start out with BDE and then see that my image is too dark. . . so usually I’ll work with the fstop first. I’ll open it up until the image is properly exposed and from there I’ll use Equivelant Exposures to find the right exposure and depth of field I’m looking for! Easy cheesy.


I KNOW that some of you are ready to rip your hair out, because this can be really confusing. HOWEVER, go back and read the first 3 posts (I, II, III all the links are up top) . . . then read and re read this one, and I promise you it will become clear. PLEASE PLEASE PLEASE feel free to ask follow up questions in the comment section. . . also PLEASE offer tips that have helped you move toward manual settings that may be able to help the rest of us! Let’s make it an open dialog and help each other out!!


Happy Shooting!


Natalie Norton is a wedding and portrait photographer who resides on the North Shore of Oahu, Hawaii. Check her work and more tutorials on her popular blog, Pics and Kicks at www.natalienortonphoto.com.


11 Surefire Landscape Photography Tips


Source Digital Photography School


My first love in photography when I first got my trusty old Minolta SLR as a teenager was landscapes. There’s something about getting out in nature with the challenge of capturing some of the amazing beauty that you see. Perhaps it fits with my personality type - but I loved the quietness and stillness of waiting for the perfect moment for the shot, scoping out an area for the best vantage point and then seeing the way that the light changed a scene over a few hours.


While I don’t get as much time as I’d like for Landscape Photography these days - I thought I’d jot down a few of the lessons that I learned in my early years of doing it. I’d love to hear your own Landscape Photography tips in comments below.


Landscape Photography Tips


1. Maximize your Depth of Field


While there may be times that you want to get a little more creative and experiment with narrow depth of fields in your Landscape Photography - the normal approach is to ensure that as much of your scene is in focus as possible. The simplest way to do this is to choose a small Aperture setting (a large number) as the smaller your aperture the greater the depth of field in your shots.


Do keep in mind that smaller apertures mean less light is hitting your image sensor at any point in time so they will mean you need to compensate either by increasing your ISO or lengthening your shutter speed (or both).


PS: of course there are times when you can get some great results with a very shallow DOF in a landscape setting (see the picture of the double yellow line below).


2. Use a Tripod


As a result of the longer shutter speed that you may need to select to compensate for a small aperture you will need to find a way of ensuring your camera is completely still during the exposure. In fact even if you’re able to shoot at a fast shutter speed the practice of using a tripod can be beneficial to you. Also consider a cable or wireless shutter release mechanism for extra camera stillness.


Related Reading - Introduction to Tripods


Get more tips and tutorials like this one by subscribing to Digital Photography School via email or RSS


3. Look for a Focal Point


All shots need some sort of focal point to them and landscapes are no different - in fact landscape photographs without them end up looking rather empty and will leave your viewers eye wondering through the image with nowhere to rest (and they’ll generally move on quickly).


Focal points can take many forms in landscapes and could range from a building or structure, a striking tree, a boulder or rock formation, a silhouette etc.


Think not only about what the focal point is but where you place it. The rule of thirds might be useful here.


Related Reading - Focal Points in Photography


4. Think Foregrounds


One element that can set apart your landscape shots is to think carefully about the foreground of your shots and by placing points of interest in them. When you do this you give those viewing the shot a way into the image as well as creating a sense of depth in your shot.


Related Reading: Getting Foregrounds right in photography


5. Consider the Sky


Another element to consider is the sky in your landscape.


Most landscapes will either have a dominant foreground or sky - unless you have one or the other your shot can end up being fairly boring.


If you have a bland, boring sky - don’t let it dominate your shot and place the horizon in the upper third of your shot (however you’ll want to make sure your foreground is interesting). However if the sky is filled with drama and interesting cloud formations and colors - let it shine by placing the horizon lower.


Consider enhancing skies either in post production or with the use of filters (for example a polarizing filter can add color and contrast).


6. Lines


One of the questions to ask yourself as you take Landscape shots is ‘how am I leading the eye of those viewing this shot’? There are a number of ways of doing this (foregrounds is one) but one of the best ways into a shot is to provide viewers with lines that lead them into an image.


Lines give an image depth, scale and can be a point of interest in and of themselves by creating patterns in your shot.


Related Reading: lines in photography“>Using Lines in Photography (mini-series)


7. Capture Movement


When most people think about landscapes they think of calm, serene and passive environments - however landscapes are rarely completely still and to convey this movement in an image will add drama, mood and create a point of interest.


Examples - wind in trees, waves on a beach, water flowing over a waterfall, birds flying over head, moving clouds.


Capturing this movement generally means you need to look at a longer shutter speed (sometimes quite a few seconds). Of course this means more light hitting your sensor which will mean you need to either go for a small Aperture, use some sort of a filter or even shoot at the start or end of the day when there is less light.


Landscapes-WeatherPhoto by 3amfromkyoto

8. Work with the Weather


A scene can change dramatically depending upon the weather at any given moment. As a result, choosing the right time to shoot is of real importance.


Many beginner photographers see a sunny day and think that it’s the best time to go out with their camera - however an overcast day that is threatening to rain might present you with a much better opportunity to create an image with real mood and ominous overtones. Look for storms, wind, mist, dramatic clouds, sun shining through dark skies, rainbows, sunsets and sunrises etc and work with these variations in the weather rather than just waiting for the next sunny blue sky day.


9. Work the Golden Hours


I chatted with one photographer recently who told me that he never shoots during the day - his only shooting times are around dawn and dusk - because that’s when the light is best and he find that landscapes come alive.


These ‘golden’ hours are great for landscapes for a number of reasons - none the least of which is the ‘golden’ light that it often presents us with. The other reason that I love these times is the angle of the light and how it can impact a scene - creating interesting patterns, dimensions and textures.


10. Think about Horizons


It’s an old tip but a good one - before you take a landscape shot always consider the horizon on two fronts.


  • Is it straight? - while you can always straighten images later in post production it’s easier if you get it right in camera.

  • Where is it compositionally? - a compositionally natural spot for a horizon is on one of the thirds lines in an image (either the top third or the bottom one) rather than completely in the middle. Of course rules are meant to be broken - but I find that unless it’s a very striking image that the rule of thirds usually works here.

Related Reading: Getting Horizons Horizontal


11. Change your Point of View


You drive up to the scenic lookout, get out of the car, grab your camera, turn it on, walk up to the barrier, raise the camera to your eye, rotate left and right a little, zoom a little and take your shot before getting back in the car to go to the next scenic lookout.


We’ve all done it - however this process doesn’t generally lead to the ‘wow’ shot that many of us are looking for.


Take a little more time with your shots - particularly in finding a more interesting point of view to shoot from. This might start with finding a different spot to shoot from than the scenic look out (wander down paths, look for new angles etc), could mean getting down onto the ground to shot from down low or finding a higher up vantage point to shoot from.


Explore the environment and experiment with different view points and you could find something truly unique.

Tags: , ,

Digital Storage for Your Images - Organization 101


Source Digital Photography School


digital-storage-images.pngHow to store your digital images is an issue that faces every digital photographer at some stage. In this post ChristinaNichole Photography shares some tips on how to do it.


I once met a very talented photographer at a digital photography class. The topic of discussion was digital image organization. Of all the students attending this class, she was extremely distraught. When asked if she needed assistance, her response was, "I never knew how to organize my pictures before, so I kept them all in one file. Where do I start?!?


Not the best-case scenario.


Though not an overwhelmingly fascinating subject, without a doubt digital storage and file handling is one of the most important lessons a photographer can learn. In the digital age, when we have opportunity to store hundreds of thousands of images on one laptop or hard drive, things can get pretty complicated to go back and try to find "that one picture of Aunt Helen at Johnny's 6th birthday party". Especially if you don't have an established workflow and file handling system.


Organizing your images will be one of the most time intensive and equally time saving tasks you can perform as a photographer. You don't want to spend hours looking for that one picture if you can simply search your catalogue for it by a single keyword or date.


Various photo organizing programs can assist you in your organizing. You can customize this organization with most programs if you import directly into the program. This list of programs would include Picasa by Google, Aperture by Apple, and Lightroom2 by Adobe. Though these programs will help you exponentially, it's helpful to begin with these general starting points:


  1. Upload your images using a unique file naming system. This way, each image has a unique name in your catalogue. This makes for super fast retrieval later on and no worries on 2 images having the same name! You have a few options with file naming, just choose a system that works well for you, and don't change it. I find the following works best for me: Date, day, initials, image number: [2008-10-20_CND_0001.jpg]

  2. Upload your images into dated folders. For example, if I have two shoots on the 20th of November, I upload all of my images into that date [11-20-2008]. In my organizing program, I will then make separate collections for each shoot - all still in that single folder. [Folder >11-20-2008> Folder > Harmon Shoot]. Retrieval becomes a matter of less than 2 minutes.

  3. Once you have uploaded your images, go through and rate each image. It sounds like a pain, but once you get used to your system the rating goes by fairly fast. The rating options defer from program to program, but in Lightroom2, I rate my images on a 0 to 5 scale. Images rated 0 - 1 gets trashed. Images rated 2 get stored and major time is spent on editing them later. Images rated 3-5 are the ones I edit immediately and are happy with showing them to clients right away.

  4. If you can, it is really smart to keyword your images. In image programs like Portfolio - dedicated to massive amounts of photo storage - and Lightroom2 also, each keyword will be kept in a collection of its own. If I have just finished a portrait shoot, I will keyword something like this: Client, location, type of images, expression [smiling, laughing etc], on location, in studio…etc. If my client is a mother who wants any other pictures of her graduating son that are smiling, I don't scroll through all my images to find those smile pictures. I simply go to my "smiling" keywords of that client and viola!

Organizing your images is a photographer's lifesaver that cannot be stressed enough! If you are a beginner, take some time to figure out what system will work best for you. Whether putting together a family photo book, or going back to make prints for a client from last year, or even archiving your images, image organization will save you time and energy in the future.


9 Tips for Getting Backgrounds Right


Source Digital Photography School


Backgrounds present both opportunities and challenges to photographers. On the one hand they can put a subjects in context and make it stand out in a way that highlights it wonderfully - but on the other hand backgrounds can overwhelm subjects and distract from them.


Some of the common problems that photographers have with backgrounds include:


  • Distracting Focal Points - we’ve all seen this happen - we line up a shot of a friend to take as a portrait and just as we press the shutter someone else pops their head up over their shoulder with a silly face. The result is that the real focal point of the shot becomes the face pulling person. This is an extreme example of distracting focal points in the background but it’s something that happens quite a lot.

  • Protruding Elements from Subjects Heads - I nearly didn’t include this one but it’s so common that I just had to mention it. When shooting a portrait one of the common mistakes is for some background element to look like it’s sticking up out of a person’s head - like a horn. It’s often trees (as in the photo to the left) but could be anything. These shots can be quite comical but can also really throw the composition of a shot off.

  • Competing Lines - if your subject has lines in it and your background also has strong lines they can compete in such a way that the image becomes busy or so that the lines clash with one another.

9 Strategies for Dealing with Distracting Backgrounds


1. Check your Background Before Hitting the Shutter Release


Ok - this strategy isn’t rocket science, in fact you’d think it almost goes without saying - but unfortunately it doesn’t and many of the mistakes that I see in photographs could have been avoided simply by checking the background before taking the shot and taking some sort of evasive action.


Always scan the background of your shots before taking a shot. Look for colors that don’t fit with the rest of the image, bright patches that might distract the eye, lines that clash, people that don’t belong etc.


2. Move Your Subject


This is once again a fairly simple technique but is probably the first thing you should consider. Quite often asking a portrait subject to take a step to the left or right will fix things either by putting the distraction behind them or by putting it out of frame.


3. Change your Shooting Angle


If you have distracting elements in the background of a shot but can’t move your subject another strategy is to move yourself and shoot from a new angle. This might mean rotating around your subject but could also include getting down low to make the sky the background or even getting up high and shooting down onto your subject to make the background the ground.


4. Using Aperture to Blur Backgrounds


One of the most useful things to learn as a way to combat distractions in backgrounds (and foregrounds) is to use the power of your lens to throw the background out of focus using depth of field. What you’re trying to achieve with this technique is a nice blurred background where you can’t really make out what’s going on there.


The easiest way to do this is to use a wide aperture (the smaller the number the wider the aperture). The wider your aperture the more blurry your background should become.


The quickest way to see the impact of this strategy is to switch your camera into aperture priority mode and to take a number of shots at different apertures. Start with an aperture of f/20 and work your way down - one stop at a time. Once you get down to under f/4 you’ll start seeing the background in your shots getting blurrier and blurrier.


5. Using Focal Length to Blur Backgrounds


Another way to help get your backgrounds nice and blurry is to use a lens with a long focal length. Longer tele-photo do help a little to get narrower depth of field (although the amount is less than many think). In actual fact the impact is smaller than it seems and the main reason for the change is that with a longer focal length the subject actually takes up more space in the frame. Lots of arguements have been had over whether focal length impacts this - you can read more about it here and here - I’ll leave it to the experts to discuss the finer points but will say that using longer focal lengths does seem to have some impact and is worth experimenting with.


6. Place Subjects In front of Open Spaces


Placing your subject a long way in front of other objects will also help to make those objects more blurry. For example if you have the choice between shooting your subject standing right in front of a brick wall or standing in front of an open field - the open field shot will have a much more blurred background simply because the brick wall is just centimeters from your subject and inside the focal range whereas an open field stretches off into the distance where everything will be out of focus.


7. Fill your frame with your subject


One of the most effective ways of removing distractions from backgrounds is to remove the background altogether by totally filling the frame with your subject. Get up close and/or use your zoom lens to tightly frame the shot and you’ll not only remove distractions but could end up with a high impact shot as well.


8. Make your Own Background


Sometimes there just isn’t any suitable background and so you might want to consider making your own. This could range from buying a purpose built studio background or simply buying some cloth to do the job for you.


I know of one keep photographer who goes out shooting photographic portraits and carries large colored sheets of card with him to put up on walls to act as a background.


The other thing to keep in mind is that in many instances you can move things around in the background of your shots (especially if you’re shooting indoors). For example I was recently photographed in my home for a newspaper and the photographer had me move a number of pieces of furniture during the shoot because they were distracting in the shots. It took a little effort but the impact in the shots was quite incredible.


9. Post Processing


I’m no expert in using photo editing software but there are numerous ways of editing a shot after you’ve taken it to get rid of distracting elements. These can include blurring techniques, actual removing of elements and replacing them and techniques such as selective coloring (ie making your subject stand out by making your background black and white (or at least sucking some of the color out of it).


7 Travel Photography Tips


Source Digital Photography School


Travel Photography is a lot of fun but presents some real challenges. Today Christina Nichole shares 7 tips to help you on your next trip.


I once heard travel photography described as one of the most important mediums of photographic communication. As the photographer, you are literally creating an entire culture for an audience of people who may never be able to visit that place. Of course, this privilege carries a heavy responsibility. You must be able to present a culture in a way that informs, educates, and entertains.


So, what do you look for? Here are seven tips that will guide you in your photographic travels…


1. Look for "the big picture". Give your audience a bird's eye view of the location you have traveled to - full of color and vibrancy. Here, I have taken this shot on one of the highest peaks of Quito, Ecuador to overlook the city.


Big-Picture-1.jpg


2. Capture things that are "out of the ordinary". What is distinctly different from your culture? These are things that your audience will find interesting.


Ordinary-2.jpg


3. Find shapes. Other cultures use shapes, curves, and lines in architecture very differently. Be constantly on the alert for buildings, fences, and paths that are unique to your culture.


shapes.jpg


4. Seek the light. Make any image stunning with some dynamic lighting. Inside cathedrals and churches facilitate beautiful lighting with stained glass windows and skylights. Wait until mid morning or afternoon to capture high sidelight that will pour through the windows and hit the floor.


Light.jpg


5. Look for contrast. Whether contrast in light tones verses dark tones, or contrast as in textures and locations, this will keep your images varied.


contrast-5.jpg


6. Third world countries especially have extreme diversity of textures, colors, patterns, and content. As a photographer, you have to unify all the different elements to an image that will "make sense" visually.


color-6.jpg


7. Photograph that which captures your soul. A poor child? A destitute village? A tropical landscape? A busy city center? Take pictures of things that matter to you, and you will come away with visually gripping images no matter where your travels may take you.


child-7.jpg


How to Photograph Children


Source Digital Photography School


How should I photograph my children? This was the question that I was asked over the weekend and one that I posted as a community discussion on the topic (thanks to everyone for submitting your child photography tips).


Below are a few of my own tips (in two parts - ’settings’ and ‘the shoot’) - keep in mind that it reflects how I photograph children and by no means do I have a monopoly on the only way to do it - feel free to add your own tips in comments below.


how-to-photograph-children.jpgPhotograph by thejbird


Photographing Children - Settings:


Lets start by looking at some tips on how to set your camera up when photographing children.


  • Aperture Priority Mode- I’d start by switching your camera into Aperture Priority mode. This will let you have some creative control over depth of field which can be an important factor in portraits. Learn more about Aperture Priority Mode. If your camera doesn’t have aperture priority mode - it might have a ‘portrait’ mode which can be worth shooting in to get those nice fuzzy backgrounds.

  • Aperture - I’d set my aperture at f5.6 to start with (you can adjust it up and down as you start shooting). This will throw the background out of focus (unless your kids are right up against a wall) but will give you enough depth of field that their whole face will be in focus.

  • ISO - Depending where you are shooting (inside or out) and what the light is like - set your ISO to 200 (lower is better if you have lots of light). If it is too dark and this makes your shutter speeds too long you can pump it up - but try to keep it under 800 or you’ll start getting lots of pixelation).

  • Shutter Speed - Keep an eye on the shutter speed that your camera is choosing. Try to keep it 1/200th of a second or faster if you can (if your kids are running around - to up to 1/500th or more). Like I say - if it’s too dark you can increase your ISO or even push your Aperture up a little. If you’re not confident with shutter speeds and your photos are coming out blurry because your children are moving too fast - you might try setting your camera to ’sports mode’.

  • Focus Mode - Set your Auto focus to single point focussing. You could leave it on the multipoint focusing mode but I find with kids that move around a lot that you want to know exactly where your camera is focusing quite precisely (this could just be me though).

  • RAW - If you have time (and the ability) to do some post production work on your images later try shooting in RAW. This will give you more license to edit your shots later. If you’re under the pump for time and/or don’t have the ability to edit your work - JPEG will do.

  • Flash/Lighting - I’m not sure if you have a flash unit or not that you can use but my preference is to limit the use of your camera’s built in flash. If you do have an external flash and you’re shooting inside - bounce it off a roof/wall (if they are white) or use a diffuser to give indirect light. Otherwise try to find situations that are well lit with natural light - this is my preferred situation - if you can do it in natural light you’re putting yourself in the position to not have to worry too much about your flash. If you’re shooting into the sun though - consider using your flash to give a little fill flash light.

  • Lens - I like to take a couple of approaches when it comes to lenses. The main approach I take is to use a lens with some real zoom capability. I love to get my 70-200mm lens out which enables me to shoot from a distance and yet still fill the frame with the child I’m photographing (this lens also has the advantage of being fast (f2.8) and having image stabilization) - even my 24-105mm lens gives good range at the 105mm end. The other approach that can be fun is to shoot at the other end of the spectrum and shoot with a wide angle perspective. Getting in nice and close with a wide lens can give all kinds of fun distortion (which when used creatively can lead to some wonderful shots). If shooting indoors or in poor lighting you might also want to go with the fastest lens in your bag.

OK - so we’ve talked camera settings - lets move on to the shoot itself.


how-to-photograph-children-tips.jpgImage by darkmatter


Photographing Children - The Shoot


Before I give some specific tips about the shoot, I think it’s worth saying that you want to get the children that you are photographing as comfortable with you and the camera as possible. Showing kids photos after you’ve taken them, letting the child look through the viewfinder and even take a few shots (if they’re old enough), spending time with the kids before taking shots - all of these things can help set the child at ease. The more relaxed they are the better.


Location - Where you shoot will depend a lot on your situation - but try to think of a 2-3 scenes/settings that you could go to before you start shooting. If you have a few hours - pick at least one outside (a park perhaps), one inside (in their bedroom or play room perhaps) and try to find a spot where you have a fairly simple background (something with color can be good) for a few posed shots. Choose places where your kids have fun, where you can show them in their natural playful environment. If you’ve got the time go to the zoo, beach or some other fun place.


location-fun.jpgPhoto by Brian Hathcock


Candid Approach - I try to shoot candidly with kids as much as possible. Get them doing something that they enjoy and just start snapping. You might ask them to stop/pause what they are doing every now and again and to look at you (at the top of a slide for instance) but over time you’ll find lots of moments in the normal run of their ‘play’.


playful.jpgImage by Jeff Kubina


‘Posing’ - With older kids you might find that they respond better to ‘posing’ moments. I find with little kids that they don’t often have the attention span for this (and they tend to pull the cheesiest smiles they can).


posing.jpgPhotography by Larryboi90


Get down on their level - You’ve got young children so unless they’re very unusual they’ll be half your height. Shooting from an adult’s perspective looking down on kids will leave you with average looking shots. Get on their level, make the camera level with their eyes (or even slightly below) - do this and you’ll get much more intimate shots.


photographing-kids-on-their-level.jpgPhotograph by carf


Alter Your Perspective - Having said that - sometimes you can get a really great shot by breaking this ‘get on their level’ rule. Shooting from directly above or below can also give a great result!


alter-perspective-childeren-photography.jpgPicture by bass nroll


alter-perspective.jpgPhotography by ToniVC


Get close/Zoom - you’ve got a lens with reasonable focal length (I’d probably prefer something a little longer myself) but you’ll want to get in reasonably close in order to fill your frame with your kids. At times it’ll be good to zoom out or step back in order to get their context - but your parents want to see your kids faces - so make sure they dominate the shot rather than their environment.


photograph-children.jpgPhotograph by thejbird


Focus Upon the Eyes - Pay particular attention to your kids eyes. If you’ve got the single zone focusing switched on - choose eyes as the focus point. You can get away with other facial features a little fuzzy but the viewer of an image always is drawn to the eyes of the subject.


eyes.jpgPhotograph by Herve Kerneis


Backgrounds - pay a lot of attention to the backgrounds of your images. A background can give context to your shots but also can be a real distraction. Before you start shooting clean up any distracting items. Make at least one of your locations a place with a fairly undestracting background. I like to try to find a colorful wall or even to set up a sheet/background for a few more posed shots with the child just standing there in front of it. Alternatively light your subject in such a way that there is no background.


photograph-children-background.jpgPhotograph by carf


Get Abstract - mix your shots up with a few more abstract shots. For instance take a picture of their shoes, zoom right in on their hands or eye lashes, get them framed so only part of their head is in shot. These more playful shots can be a lot of fun and will add variety to the end results of your shoot.


abstract.jpgImage by melinkita


child-photography-abstract.jpgPhotograph by mpisti


Clothes - my motto with clothes is to choose some that the child feels comfortable in and that reflects their personality. If you put them in their Sunday best but they can’t move freely - your shots will look stilted. The only other advice on clothes is that sometimes bold, plain colors can work well. Perhaps have a couple of outfits on hand that you change them into between locations.


clothes.jpgPhotography by Wazari


Shoot in burst mode - for at least part of your shoot switch your camera into burst mode (where the camera shoots a lot of shots fast). I actually usually shoot a whole shoot in this mode - but particularly when shooting outside or at a park where your kids are on the move it can be very useful. Look for ’series’ of shots that might go together in a multiple image frame on a wall OR which you could put together into one image with photoshop (a child running, sliding down a slide, on a swing, doing a dance, riding a bike…) - these can be a lot of fun.


continuous shooting.jpgImages by Diyosa


burst.jpgPhotography by Glenn Loss-Austin


Include other People - one good way to help relax a child if they’re a little tense and to give an image a little more context/story is to add another person into the image. Whether it be a sibling, parent, friend - adding a second person into a shot adds another point of interest and introduces the idea of ‘relationship’ into your image. It can also distract the child from you and help them to be a little more relaxed.


photographing-children-people.jpgImage by dlemieux


Speaking of fun - do your best to make the shoot as much fun as possible. Show the children some of the shots you take, ask them to do funny things, be funny yourself - all of this will bring energy to your shoot, help the child to relax and capture some of their spirit. The more fun they have the more genuine and engaging the shots will be.


fun.jpgPhoto by Todd Baker


These are just some of my tips for Photographing Children - what would you add? Got some great kids portraits already? Share them with us in the Share Your Shots section of our forum.


3 Books for Further Reading on Photographing Children


  1. Photographing Children Photo Workshop: Develop Your Digital Photography Talent

  2. The Art of Children’s Portrait Photography

  3. The Sandy Puc’ Guide to Children’s Portrait Photography (Sandy Puc Guide)